In the shop Woodworking
A cutting board, from what was left over
A small build to use the offcuts from other projects — and a reminder that the most beautiful wood often comes from the pile you were about to throw away.
“The grain you'd never have paid for is the grain you can't stop looking at.”
Why this build
Every project leaves a pile. The desk leaves walnut. The shelf leaves maple. The frame leaves a strip of cherry too short for anything but too good to burn. After a few years, the offcut shelf becomes its own material — a quiet inventory of everything I’ve made, in cross-section.
A cutting board is the perfect way to draw down that inventory. It asks for short pieces. It rewards mixing species. It needs no joinery beyond clean glue lines. And when it’s done, it goes into daily use rather than display — which is, frankly, where I want most of what I make to end up.
The species
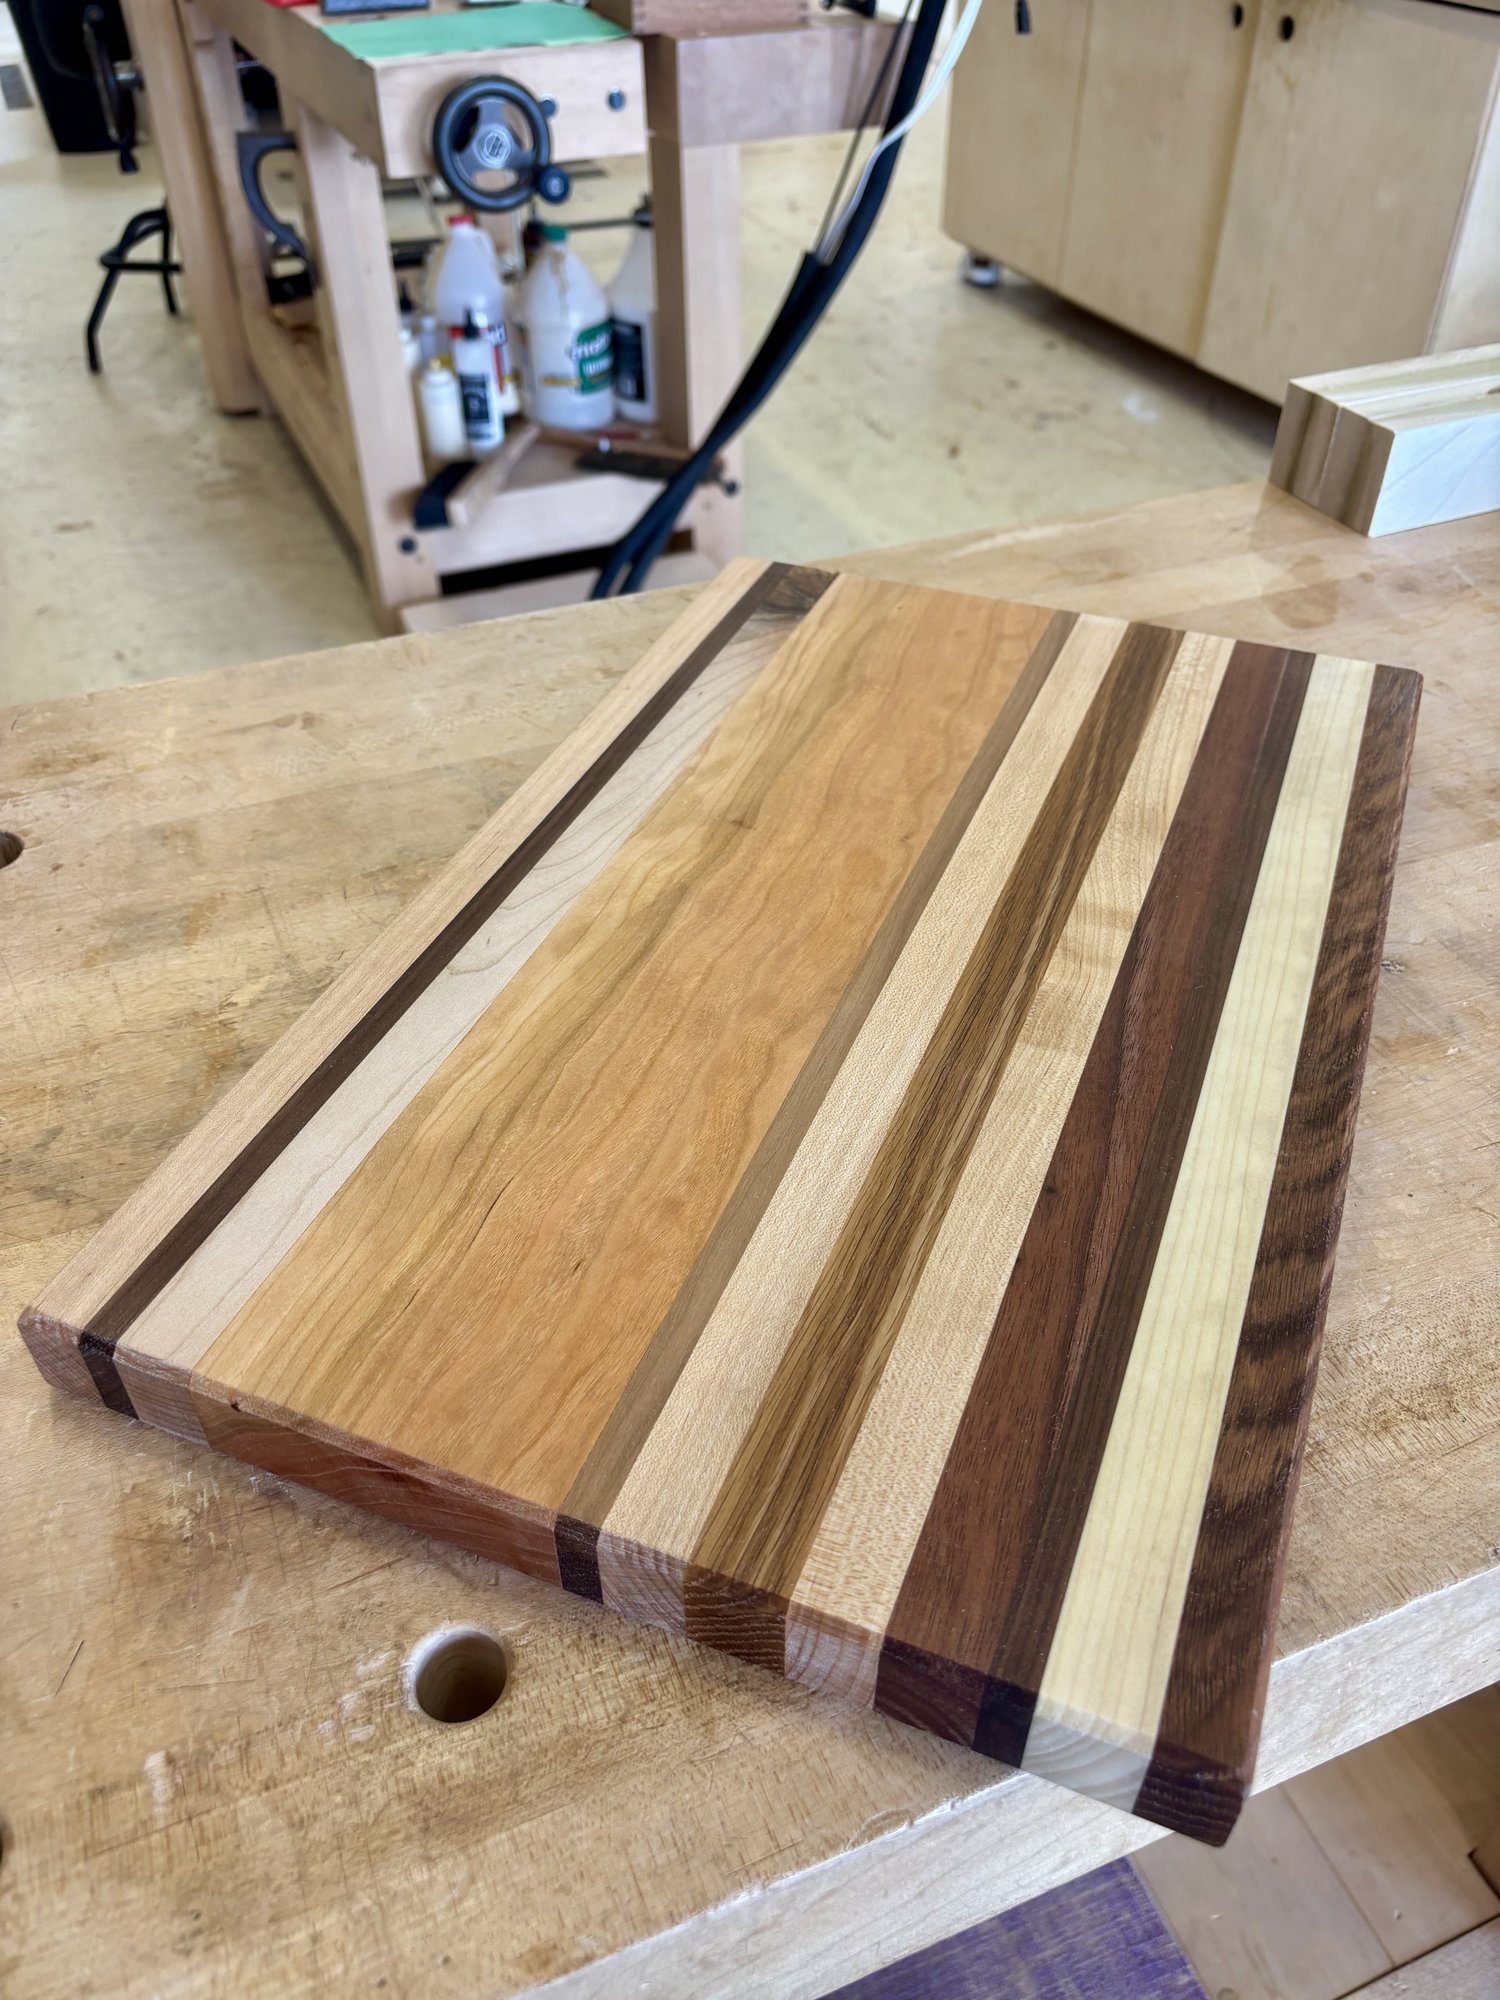
Four woods came out of the offcut bin for this one: walnut, cherry, maple, and a piece of red oak I’d been saving because of the distinctive grain. No two strips matched in width on purpose — varied widths read as designed; uniform widths read as a kit.
The hardest part of the design happened before any tool came out: lay out, look, re-arrange, look again. I moved strips around the bench for the better part of an hour before I committed to an order. The goal was contrast without chaos — enough variation to be interesting, enough rhythm to feel composed.
Glue-up
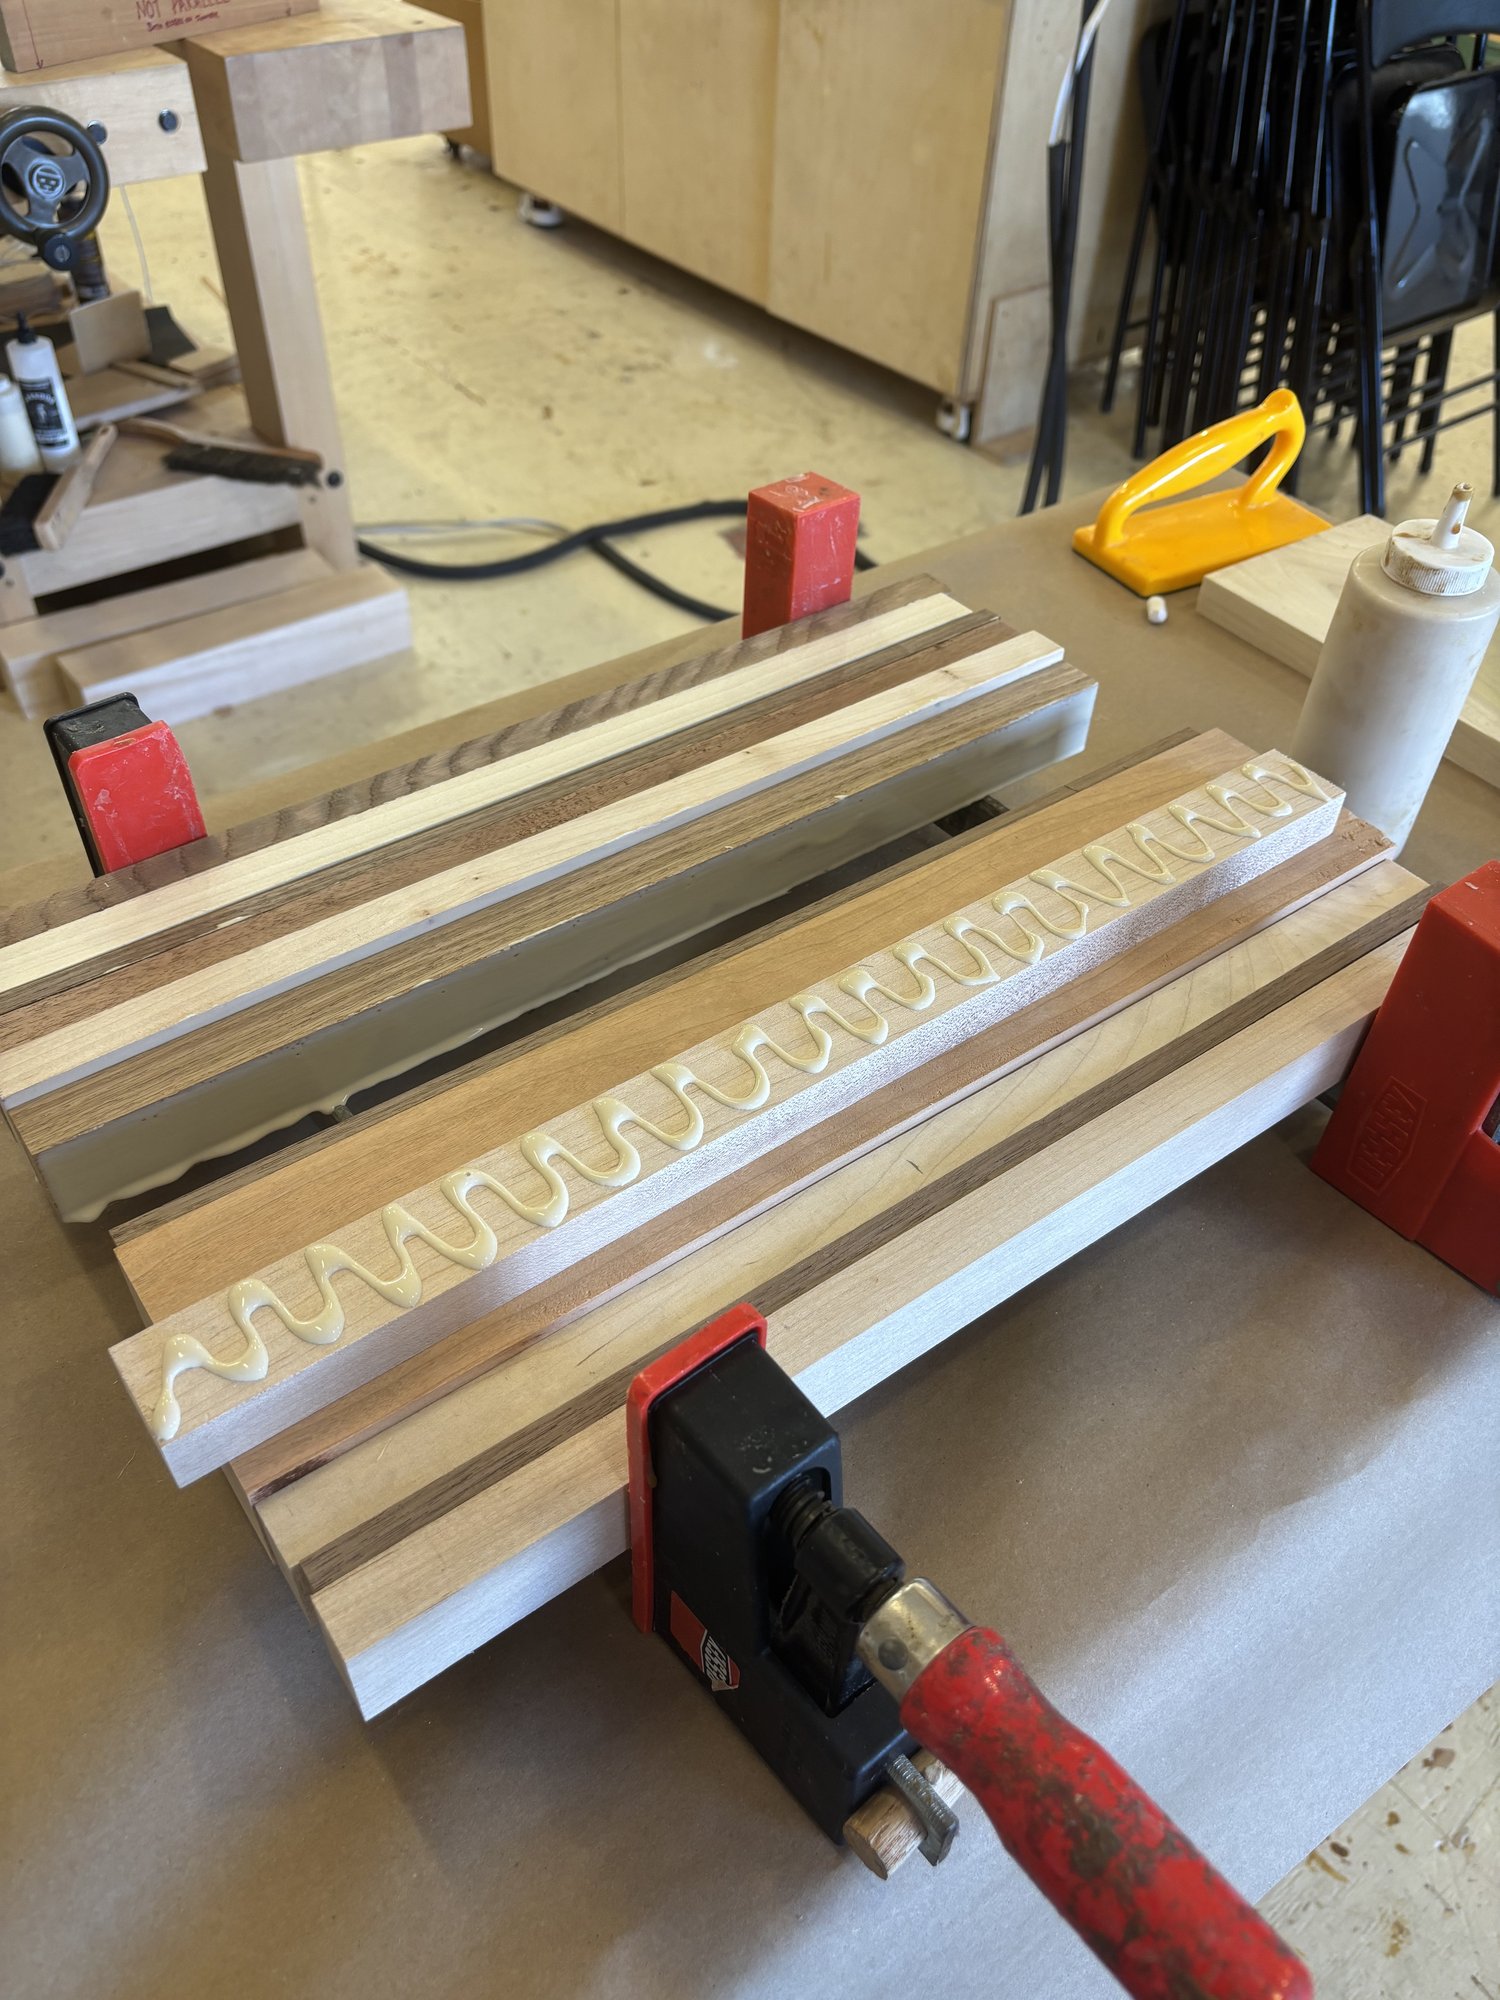
The zigzag pattern matters more than it looks like it should. A continuous bead down the center won’t spread to the edges before the glue starts skinning over; a zigzag lets a roller or a flat spreader distribute the glue across the full width of the strip in seconds.
Working time is the constraint here. With this many strips and this much surface area, you have maybe ten minutes from the first bead to the clamps being snug. After that, the seams start to set up before the panel is fully closed. I lay out all the glue first, then assemble top-to-bottom in one continuous motion, then go straight to the clamps.
In the clamps
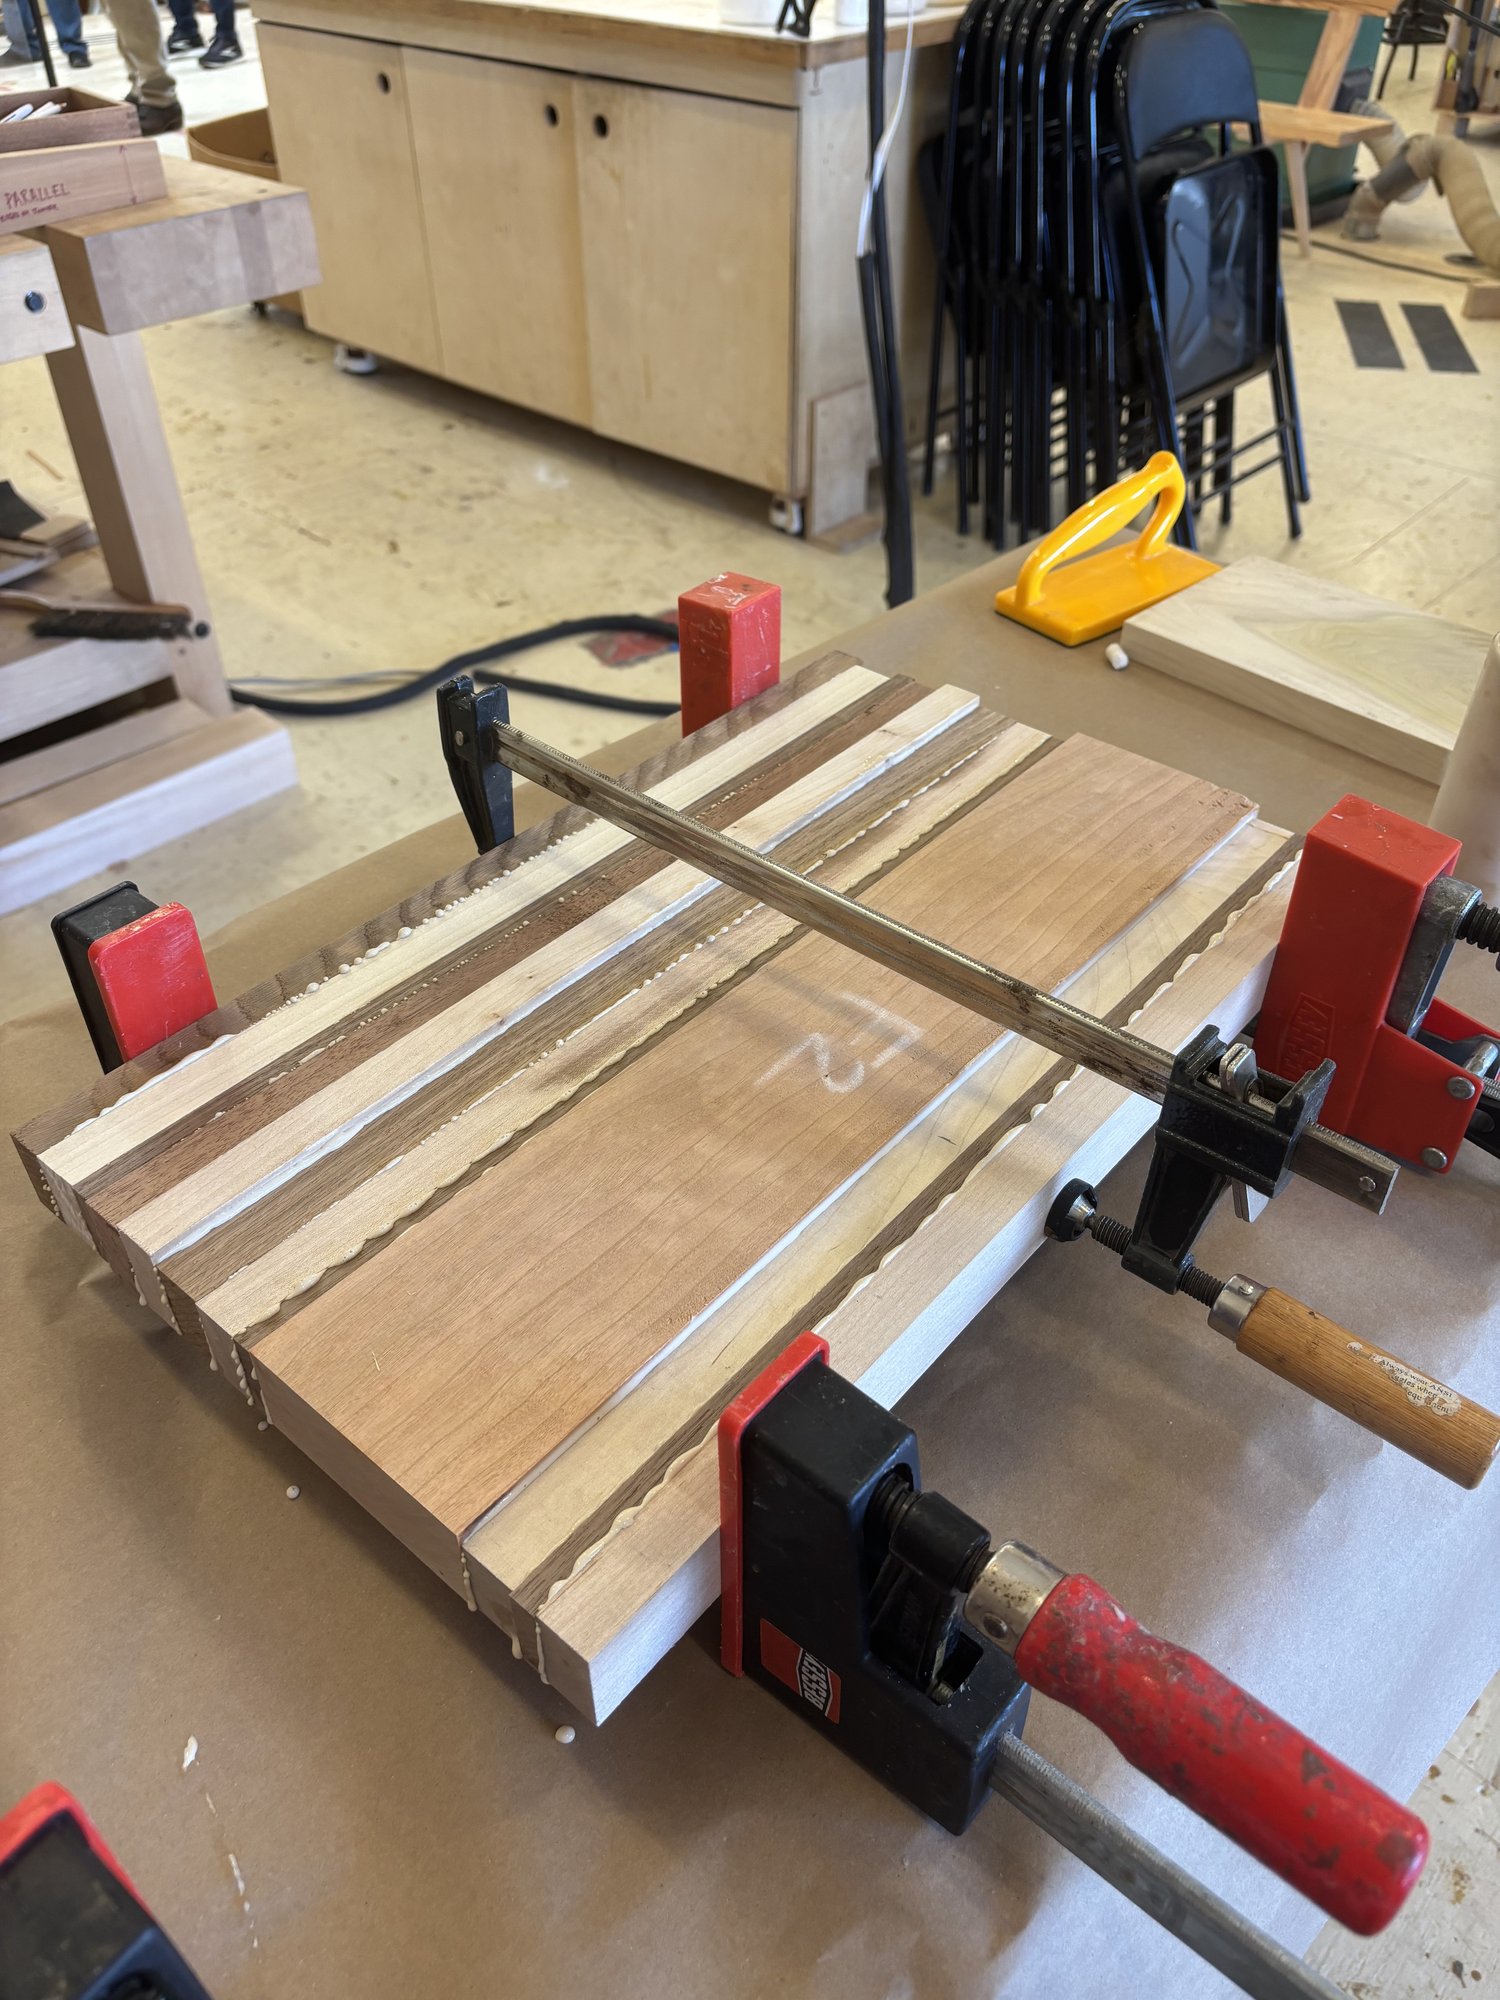
Multi-strip glue-ups want to bow. The horizontal clamps press the strips together, but as they tighten they also push the panel upward, into a slight arch. The fix is the small clamp across the top: just enough pressure to keep the panel flat against the bench while the side clamps do the real work.
The squeeze-out along every seam is the signal that the joint is fully closed and starved of nothing. A dry seam — no squeeze-out — is a seam that may fail later. I’d rather scrape glue tomorrow than have a board come apart in three years.
Overnight in the clamps. The next morning, glue is leather-hard rather than fully cured, which is the easiest state to remove it in. A card scraper or a chisel takes off the squeeze-out cleanly, with no risk of tearing the surface.
Flattened
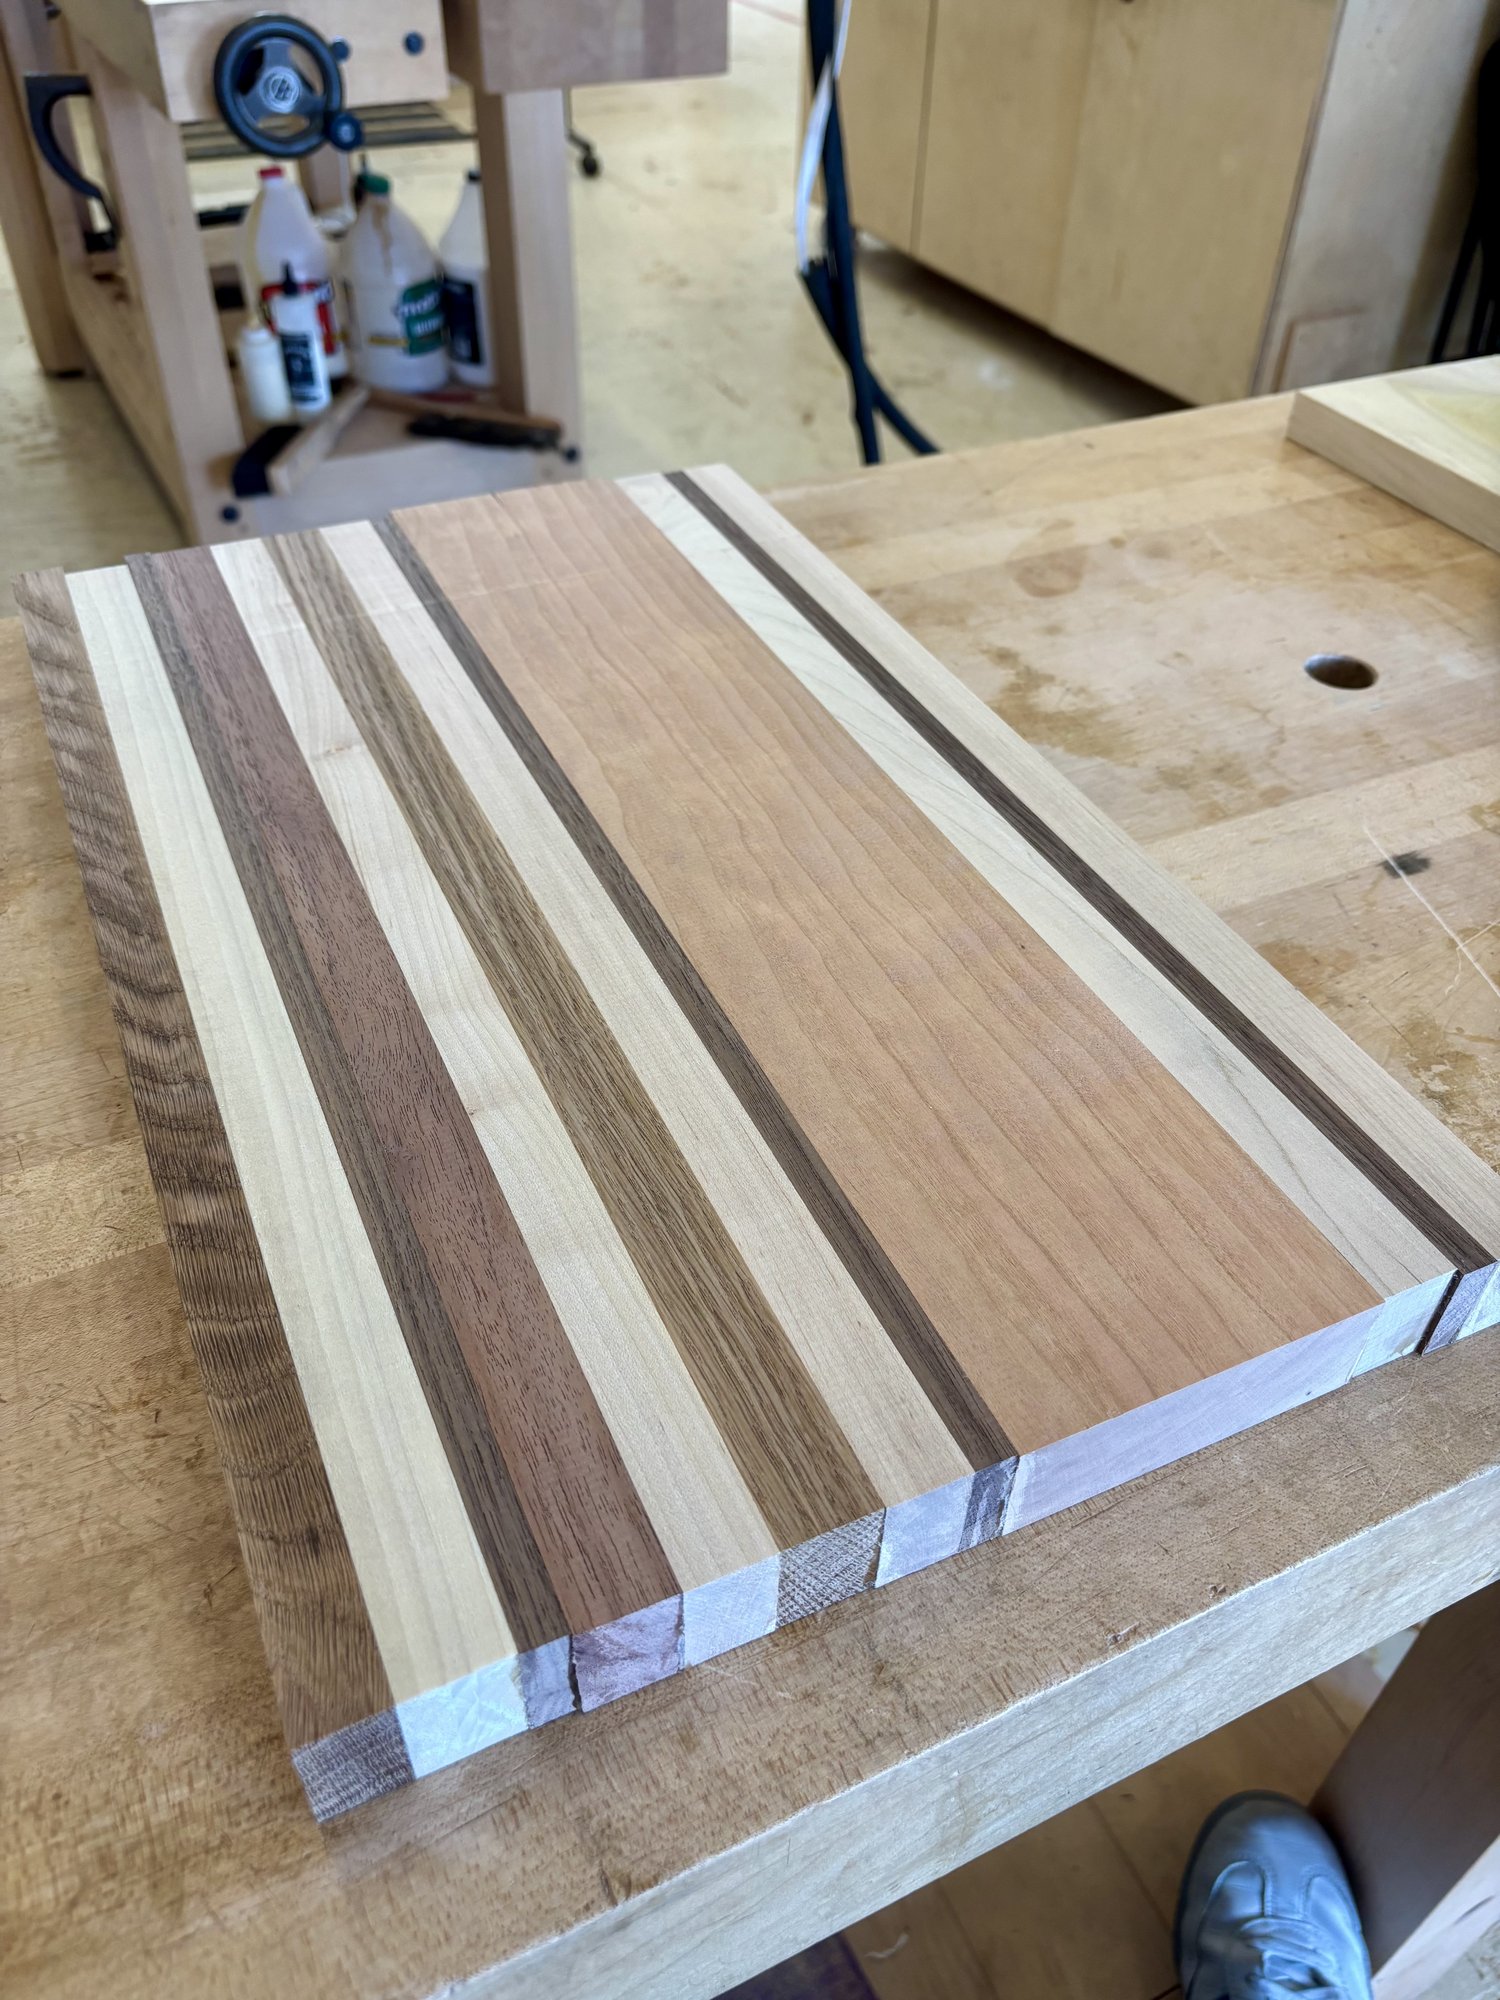
This is the moment that pays back the hour of layout. The first pass across the flattening jig reveals the pattern you’ve been carrying in your head — except now it’s real, and almost always better than you expected.
You can see the asymmetry in the stripe widths here: that’s intentional, not careless. A board with all equal stripes reads as mechanical. A board with varied widths reads as designed. The wider cherry strip toward the center is the focal point; the thinner walnut lines on either side are punctuation.
The end grain still shows clamp marks and traces of squeeze-out at this stage. That’s the next round of work: trim the ends square, clean up the edges, ease the corners.
Finished
Three coats of food-safe mineral oil, applied with a rag and twenty minutes apart between coats. Then a final wax-and-oil mix, buffed in by hand.
The oil is the moment the board becomes itself. Before finish, the species are visible but flat. Under oil, every grain pattern lifts, the walnut goes nearly black, the cherry warms toward amber. Cherry will keep darkening for the next year as it oxidizes — by next spring this board will look noticeably different than it does in this photo. Maple stays close to where it started. The oak holds the edge with that beautifully open, coarse grain.
A 1/8” roundover on the router table softened every edge. Just enough to break the corner so it’s comfortable in the hand, not so much that it reads as soft.
This one is headed to the kitchen, not the shelf.
What I keep relearning
That the pile you’re about to throw away is, often, the most interesting material in the shop. No rational customer would put walnut and cherry and maple and oak in the same project on purpose, which is precisely why offcut boards look like nothing you’d buy. The constraint of using only what you have produces design decisions you’d never reach otherwise.
That small projects between bigger ones aren’t a detour. They’re how the shop stays generative. A weekend on a cutting board reminds me why I started, and resets my patience for the slower builds.
That a project doesn’t have to be precious to be worth doing well. This board will get scratched, oiled again, eventually worn down through years of dinner prep. That’s the whole point.